|
Global CASHplus CashWeb |
|
Global CASHplus CashWeb |
Defining authorization matrix
![]()
Any transaction originated in GCP CashWeb must be approved by one or more responsible users of the system. An authorization matrix definition ensures that a transaction passes through the approval process to safeguard it against any deviation or fraud.
The authorization matrix is defined based on either the MyProduct or the Account master, as per the value set in the MyProduct master. In this master, for each product or account you need to set up various limits. For each limit, you need to assign the users who are required to approve the transaction.
Note:
• Before you set up the authorization matrix master, ensure that you have set up the product/account masters.
• Corporate user is allowed to change auth matrix if all transactions for that MyProduct are either completely authorized or completely unauthorized.
In this Topic
1. Click Admin from the header menu.
2. Click Product Setup >> Authorization Matrix to open the Authorization Matrix List summary screen. The authorization matrix list screen displays all authorization matrices that you have defined in the system, along with their state of authorization. Against every definition you have the option to delete, enable, or disable that record.
3. Select Authorization Matrix from the Authorization Parameter drop-down list and click Add to go to Authorization Matrix Entry screen.
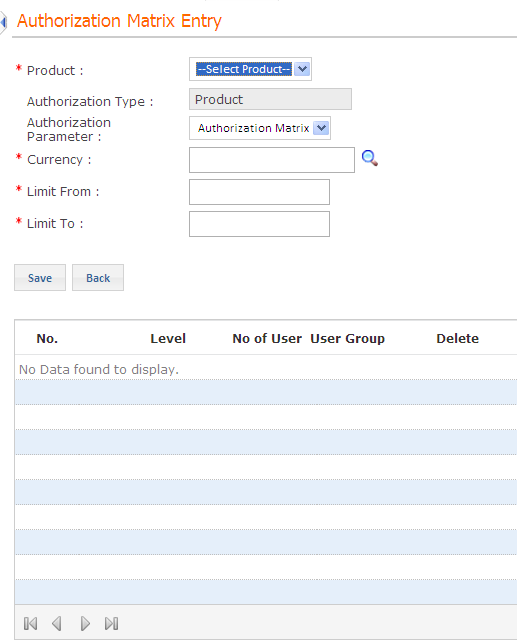
4. Specify the following details:
· Product: Select the appropriate product from the drop-down list.
· Authorization Type: Displays the category of authorization as product for the authorization matrix.
· Authorization Parameter: This field displays the value specified in the Authorization Matrix List screen. You are not allowed to edit this field.
· Currency:
Click ![]() to select appropriate currency. The default
value of this field is the base currency.
to select appropriate currency. The default
value of this field is the base currency.
· Limit From and Limit To: Type the lower and the upper transaction limit in the respective fields. This limit is a range of transaction amount that decides the application of the authorization rule. Any transaction initiated is saved only if it satisfies the specified limit.
5. Click Save to save the definition. The Add Detail button is enabled to add the authorization details.
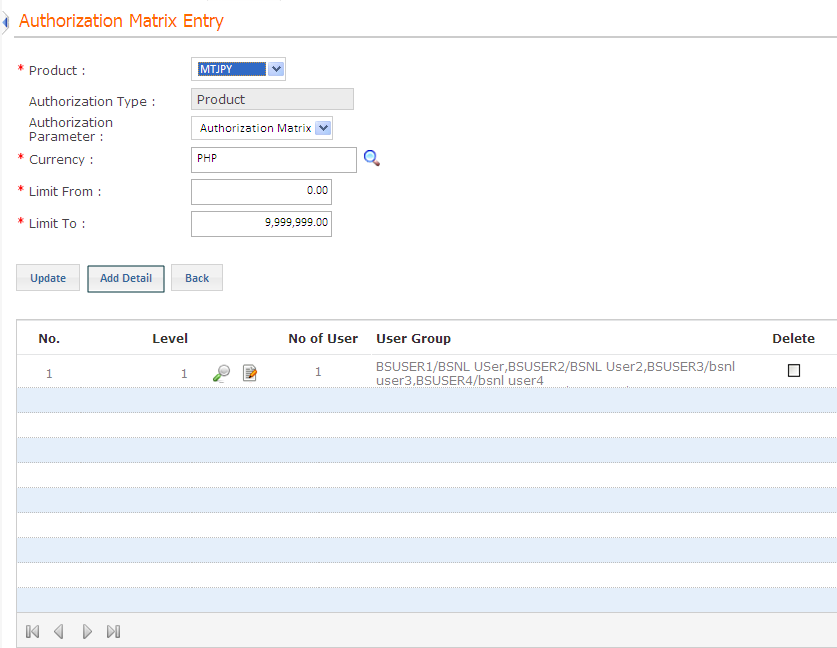
6. Click Add Details to open the Authorization Matrix Detail Master screen.
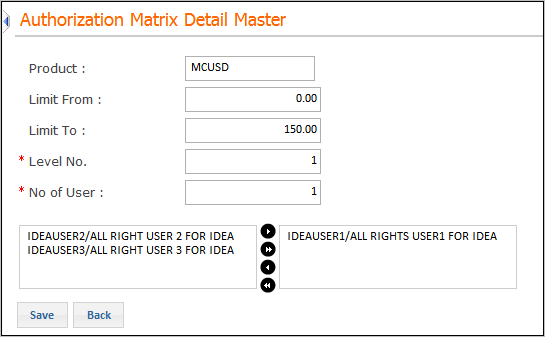
7. Specify the following details:
· Level No.: Type the sequence number for the level which you are defining. If the authorization matrix definition being set up contains multiple levels, the authorization process proceeds as per the sequence number specified here.
Note:
• An authorization matrix definition may include as many levels as required, depending on your organizational or functional complexity.
• In case of multiple levels within an authorization matrix, the next level of authorization in sequence can begin only after the previous level of authorization has been completed
· No. of Users: Type the number of users involved in authorization process at this level.
8. Select the users from the available list, allocated as authorizers for this matrix and click the arrow button as shown in the previous figure. These are the users linked to the product in the User Product master.
9. Click Save to save the new details. The Add Detail button is enabled again if you want to add more levels and users. Repeat the process for every new level and user to be added.
Note: The level definition is added to the Authorization Matrix Entry screen in the grid which displays all levels which you have defined for the authorization matrix definition, along with the users and user groups. Against every level definition, you have an option to delete the definition.
10. Click Update on completion of the level definition to go back to the Authorization Matrix List screen. The authorization matrix definition is added to the list in the Authorization Matrix List screen with its status as New.
Note:
•Changes in auth matrix can be done only if all transaction for that MyProduct are either completely authorized or completely unauthorized.
•The new auth matrix would also be applicable for transactions which are in completely unauthorized state and also for the newly created transaction.
Authorization is required for all newly setup or edited authorization matrices. Click here to know more about Authorizing Master Definitions.
The Signatory Matrix Entry screen allows you to set limits for each product or account. For each limit, you need to assign the categories or users who are required to approve the transaction.
1. Click Admin >> Product Setup >> Authorization Matrix to open the Auth Matrix List screen. The Auth Matrix List screen displays all authorization matrices that you have defined in the system, along with their state of authorization. Against every definition you have the option to delete, enable, or disable that record.
2. Select Signatory Matrix from the Authorization Parameter drop-down list and click Add to open Signatory Matrix Entry screen.
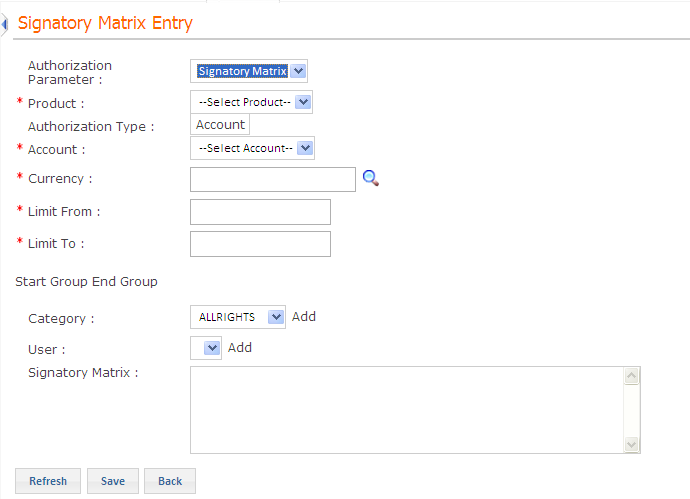
3. Specify the following details:
· Authorization Parameter: This non-editable field is automatically populated with the value specified in the Authorization Matrix List screen.
· Product: Select the appropriate product from the drop-down list.
· Authorization Type: Displays the category of authorization such as Product or Account as defined for the authorization matrix. In case of Account, you need to select the account number.
· Account: Select the account number if the authorization type is selected as Account.
· Currency: The default value of this field is the base currency.
· Limit From and Limit To: Type the lower and the upper transaction limit in the respective fields. This limit is a range of transaction amount that decides the application of the authorization rule. Any transaction initiated is saved only if it satisfies the specified limit.
· Start Group and End Group: Click Start Group, if you want to use the logical operator ‘AND’. Click End Group, if you want to complete the usage of the ‘AND’ operator. Any category or user you select hereafter is followed by an ‘OR’ operator.
· Category: Select the category, if you want any user belonging to this category to authorize the transaction and click Add. The selected category is displayed in the signatory matrix box.
· User: Select the user, if you want any particular user to authorize the transaction and click Add. The selected user is displayed in the signatory matrix box.
· Signatory Matrix: This field displays the rule for SVM to be followed in order to authorize the transaction for the specified MyProduct.
4. Click Save.
Authorization is required for all newly setup or edited signatory matrices. Click here to know more about Authorizing Master Definitions.
|
© 2014 Fundtech. All rights reserved. |